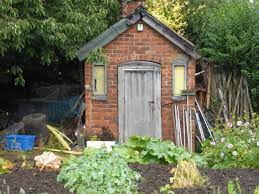
The Shed
Mid winter, particularly that nomens-land between Christmas and New Year is a great time to tackle, possible the most forgotten place in the garden, the shed. Often crammed to over flowing with, broken and discarded tools and cracked plastic pots and some very suppositious looking chemical bottles and boxes which have gone soggy and have labels falling off. This is the time to put aside a day or more and get things ship shape, ready for the growing season ahead.
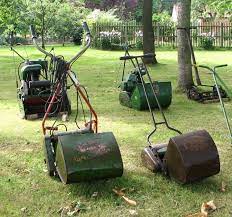
The lawn mowers and other kit
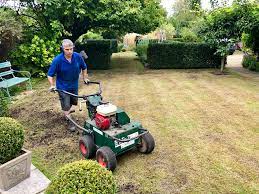
The first thing to tackle is getting your lawn mowers and strimmers in to be serviced and have the blades sharpened, before Christmas if possible. Hopefully on the last couple of cuts, you managed to use most of the petrol, so it want go ‘stale’ sitting in the lawn mower/strimmer tank over the winter. Next unhook the spark plug for safety and on a dry day tip the mower over and remove all old grass and brush and scrub down also clean the surface of the mower. With strimmers give a general clean and in particular all guards. Ready to take your machines in for servicing.
Next check all seeds, they should be stored in a water proof box some where cool and dry. It is very easy to end up with lots of half packets of seed. Look at the ‘sow by date’ this is a good guide, however of course some can still germinate after this date. If you are not sowing direct into open ground of course you can use the seed and see what happens. If the seeds are for direct sowing, then perhaps use then up on a small area and buy fresh seed in date for a more guaranteed show. Always sow, carrot,parsnip, sweet corn and lettuce for example as fresh seed. Last years half opened seed will give poor results.
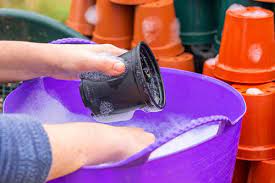
washing plant pots
Most sheds seem to be two-thirds full of plastic pots in a variety of shapes and sizes. Get bold and really reduce them down. Decide are they all going to be round or are you going for square, the stacking and sizing will be easier if you keep to the same shape. plastic pots also crack and break over time. So get sorting the sizes out and washing in a mild disinfectant solution, dunking in water afterwards and then leave to dry before stacking in the sizes back in the shed. Sadly plastic plant pots are the real environmental disaster of the horticultural industry, with few nurseries having a returns policy and at the moment as most pots are black, they can not be recycled in local authority recycling systems. However, there is some hope on the horizon, plastic pots in colours that can be recycled are being used, light blue and pink etc. But much better; pots are being produced for the nursery sector using compostable materials like cardboard fibre and coconut fibre etc. so we all have to hope this will become much more wide spread and will become the future
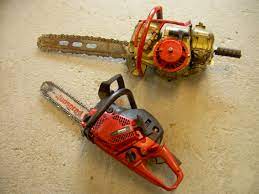
chain saws
If you have completed your winter hedge cutting and have used your chain saw a lot, then now is the time for them to have a full service. Disable the machines so they are safe to clean, with a soft brush, brush all surfaces and the blades and chain, so they are ready for surfacing. It is advisable to have at least one spare chain for the chain saw, so all the chains will need to be sharpened.
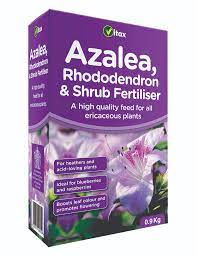
Fertilizers and plant food.
So now is the time to sort your way through your garden ‘Medicine Cabinet’ wearing rubber gloves. It is far to easy to keep that box of sequestrated iron over a number of years and then realise with the damp it is now one huge solid lump and falling out of the box. Some old compacted plant food/fertiliser can be broken up and dissolved in water and still used as a liquid feed. Follow all manufactures instructions.
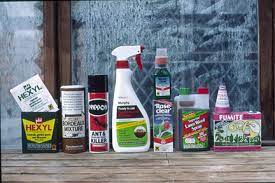
Herbicides and Pesticides.
Then turn your attention to the ‘nasties’ these are the herbicides and pesticides that you have in your shed. Again were protective gloves and long sleeves and possible a face shield. Follow manufactures instructions on safe handling.
Firstly are they all still licensed for use? www.rhs.org.uk/prevention-protection/withdrawn-chemicals. Would be the first place to check, to see if the old bottle at the back of the shelf should still be in residents in your shed. Check all the bottles and containers are in there original packing with their instructions on use and handling attached. Check there are no broken or leaking containers. Check use by dates.
Any chemicals that need to be disposed off, must be in their original packaging. Contact your local authority for advise on where you can take your unwanted chemicals, you can also have a look at the website. www.gardenchemicaldisposal.co.uk

Sort your chemicals safely.
I would suggest having 2 separate high shelves, one for foods/fertilisers and one for chemicals/herbicides and pesticides.
Of course once you started sorting through your garden ‘medicine cabinet’ you might decide you want to go organic and let nature take control.

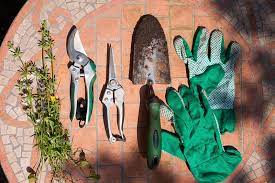
Clean tools and oil.
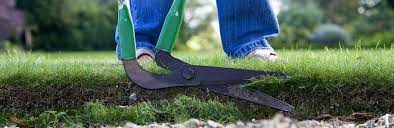
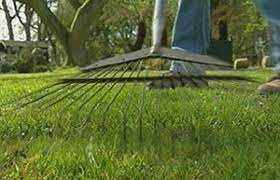
Now after a growing season of hard graft, check and clean and care for your hand tools. Do any need new handles? clean all mud and soil from the blades, sharpen spades and hoes, or send them off to be sharpened and oil all tools. Shears and secateurs after a long season will need sharpening, again you can do this yourself with a wet stone, but if you are not comfortable, then many garden centres and nurseries offer this service.
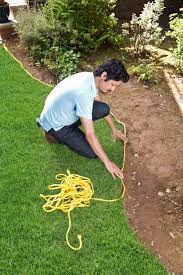
Go through you bags of opened compost, reduced them and roll or tie the top. If you can get them under cover so the rain is not leaching out the nutrients in the compost, that is better, perhaps a spot at the back of the shed. Also now you are not in a flat spin in the growing season, get that muddle of a fruit net out of the shed and fold or roll it and put in a labelled bag, do the same with any garden fleece.
hand tools
So now you can see the back of the shed and you can move about in it, would more selfing help or hooks to get the hand tools off the floor of the shed so there is more room for the mower be a good idea? As the enthusiasm is now high this is the moment to get going on some shed DIY.

Get painting or staining your shed.
Perhaps the shed it’s self could do with some TLC? a fresh coat or couple of stain or paint? re-felting? new door furniture, now is as good a time as any.
I hope I have inspired you to work off some of the Christmas pudding and get cracking on a winter clearance of your shed. One thing is for sure, you will have earned a cup of tea and a big slice of Christmas cake!