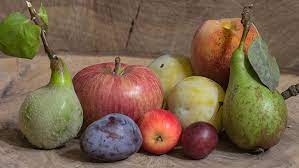
Autumn Harvest
October heralds the garden harvest, when all your hard labours in the fruit and vegetable garden are now realised. It often also produces a glut of produce and once you have exhausted all your family and friends with ‘food parcels’, the next thing to do is get preserving so all this tasty home produce can be enjoyed through the winter months ahead. Here are a few ideas.
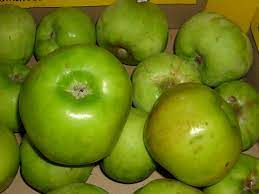
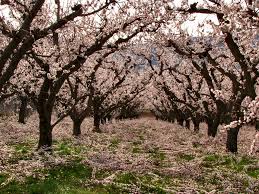
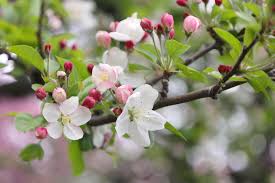
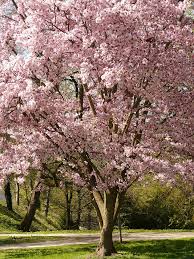
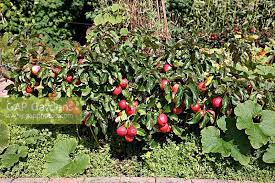
Apple Bramley’s Seedling
Apple Bramley’s Seedling: The classic cooker, found in many gardens, needs 2 pollinators, crops November to March. Large fruits with crisp juicy flavour.
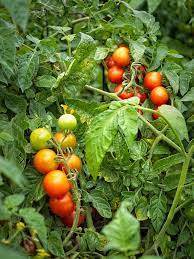
Tomato ‘Gardener’ Delight’
Tomato Gardener’s Delight: A well know variety that is an easy to grow cane fruit, with medium sized red salad tomatoes.
Green Tomato and Apple Chutney: A classic chutneys and prefect for glut crop
Recipe: 900g/2lb Cooking apples, peeled, cored and remove all bruised and damaged areas. Rough chopped.
15ml/1tbsp: mustard seed, 900g/2lb, green tomatoes rough chopped.
350gms/ 12oz Onions, skinned and rough chopped. 1Garlic clove, skinned and finely chopped.
225g/8oz Sultans. 350G/12ozs demerara sugar. 25ml/5tsp curry powder. 5ml/1tsp cayenne pepper.
20ml/4tsp salt. 900ml/1 ¼ pints malt vinegar.
- Using a large preserving pan. Put the apples in with ½ pint of water and cook till tender.
- Add all the other ingredients and stir well until the sugar has dissolved.
- Heat gently for about 3 hrs, stirring occasionally, to prevent sticking, until most of the liquid has gone and the chutney is a soft brown colour.
- Prepare sterilised jars, warm ready, pot the chutney will still hot, and cover in the usual way with waxed discs (wax surface down).
- Label and store. Tip: due to the vinegar in chutney, metal jar lids will go rusty, so use plastic lids or just the cellophane covers.
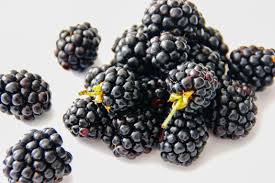
Blackberry Lochness
Blackberry Loch Ness: Thornless variety which is a reliable cropper. With large berries.
Blackberry cheese: cheeses became very popular in Elizabethan times it is like a very solid jam that can be stored in an open dish and be cut into sliced or squares to be enjoyed on crackers or toast.
Recipe: 900g/2lbs Blackberries, ripe and undamaged. 450G/1b cooking apples, peeled cored and rough chopped. Sugar ( quantity depends on the weight of the fruit puree)
- Put all the fruit into a large persevering pan with 1 pint of water and cook for about 30 mins until fruit is tender.
- Now spoon the fruit into a large sieve and press through with a wooden spoon. Measure the puree. For every 600ml/1 pint of puree add 350g/12oz of sugar.
- Heat gently stirring the sugar until dissolved., bring to the boil cook until the mixture becomes thick and the wooden spoon leaves a clean line when drawn through the mixture.
- All need to be sterilized. Either put in jars or shallow dishes and cover in the normal way or the cheese can be put into small moulds, so the cheese can be set and then turned out and served whole.
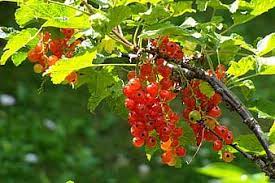
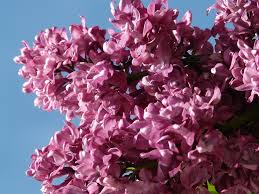
Redcurrent ‘Red Lake’
Red current Red Lake: Mid -season current with bright red fruit and a heavy cropper.
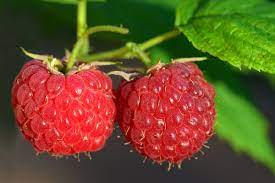
Raspberry ‘Malling Jewel’
Raspberry Malling Jewel: Main crop, firm good flavoured fruit perfect for freezing and persevering.
Summer fruits in Vodka: There is nothing like experimenting with flavours by adding fruit flavours to your favourite spirits. They also make great Christmas gifts as the fruit will have infused after a few months.
Recipe: 450gs/1lb of mixed soft fruit, red currents, raspberries, loganberries. All stems and leaves removed and any damaged fruit. 17g/6oz caster sugar. Vodka
- Thoroughly clean a large glazed stone ware jar, with firm lid and which can fit a saucer inside it.
- Toss the fruit in the sugar until completely covered and leave for 2 hrs.
- Layer the fruit into the jar, then pour in enough vodka to completely cover the fruit.
- Place the saucer on top of the fruit to keep it completely submerged. Now cover with a layer of tight cling film. Add the lid and store in a cool dry place.
- Every week or so stir the mixture to make sure the sugar and vodka are fully mixed. Make sure you cover well.
- Label and store for at least 1 month before using, the longer you can hold off the better the flavour. The fruits can be eaten with ice cream or cream and the fruit vodka will be like a liqueur.
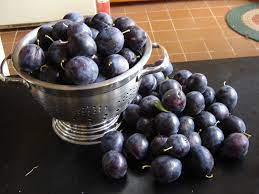
Damson Farleigh
Damson Farleigh: Also know as the Crittenden Damson, The earliest Damson to crop. No need for a pollinator. Good flavoured black fruit with green juicy flesh.
Damson Jam: This is a beautifully flavoured jam and well worth making as it is not available in shops.
Recipe: 2.3kg/5lbs wash and undamaged and ripe Damsons. 2.7kg/6bls sugar. A knob of butter.
1) Put the fruit in a preserving pan with 900ml/1.1/2 pints of water. simmer until the fruit is soft and pulpy.
2) Remove the pan from the heat and stir in the sugar until dissolved. Add the butter.
3) Put back on the heat and boil. Using a slot spoon, remove the stones as they come to the surface.
4) Continue to boil until setting point is reached.
5) Remove any scum from surface with slot spoon, pot and cover in the usual way.
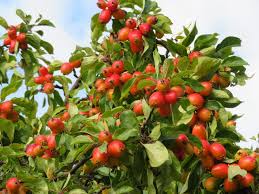
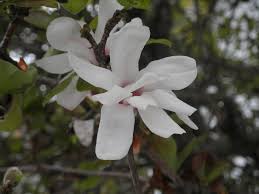
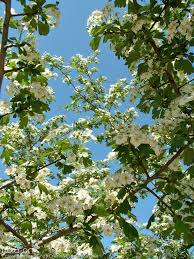
Crab Apple John Downie
Crab-Apple John Downie: A large showy crab-apple with upright habit. White blossom and in September large conical yellow flushed red fleshy fruit, full of flavour.
Crab- Apple Jelly: Jellys are beautiful with their clear colour and full flavour. Either used with roast meets, traditionally Lamb or cold meats or as a less sweet treat on scones.
Recipe: 2.5kg/5.1/2 lbs washed undamaged crab-apples all stalks and leaves removed. 6 cloves. Sugar ( depending on quantity of jelly)
1) Rough crop the crab -apples ( do not peel or core!). Put in preserving pan with 1.7L/3 pints of water. Bring to boil. Simmer for about 1.5hrs. Until fruit soft and pulpy. Stir to stop sticking. Add a little more water if needed.
2) Spoon the fruit into a jelly bag. Turn a short stall upside down. Attach the jelly cloth to the 4 legs and leave to drain into a large bowl. ( over night is good.)
3) Once all the liquid has drained through the bag, discard the pulp.
4) Measure the liquid. For every 600L/1 pint of liquid add 450g/1lb of sugar. Return to pan and heat gently.
5) Stir to prevent from sticking and bring to the boil, boil until setting point is reached.
6) Remove any scum and pot and cover in the usual way.
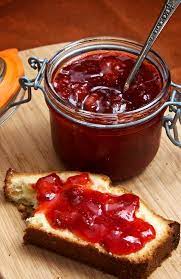
Enjoying Homemade Jam
Top Tip: for all preserving, use ripe ( depending on the recipe) and most importantly undamaged fruit. Good equipment; a jam thermometer is a must. All jars and bottles need to be clean and then sterilized . Make sure all tops and lids are also sterilized. For jams, jellies, chutneys and relishes make sure you have wax discs and cellophane tops and rubber bands. NB the waxed side of the disc is what goes against the jam/chutney surface. A pack of labels with date made and in Chutney case a date it can be eaten ( All chutneys need about 3 months to mellow before eating, so one made in October will be perfect for the cold ham and turkey on boxing day!)
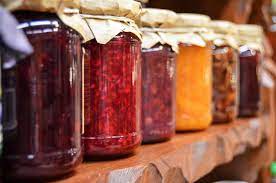
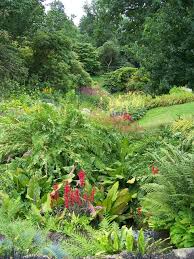
Stored jams, preserves, chutneys and pickles from the garden harvest
I hope I have inspired you to get cracking with preserving your crops or even to get planting some fruit so you can have home made, jams, jellies, fruit spirits and liqueurs and chutneys and relishes on tap. So even in the depths of winter you can still enjoy the abundance of summer.
Enjoy !